typora image uploader(picGo+token)
typora screenshot uploader setting by picGo + token
📜 제목으로 보기
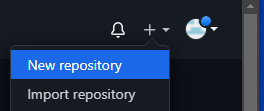
스샷 레포 생성 후 토큰 생성
-
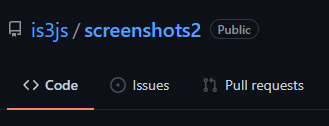
빈 github_id로 로그인해서 스크린샷 레포를 만든다.
-
프로필 > Settings >
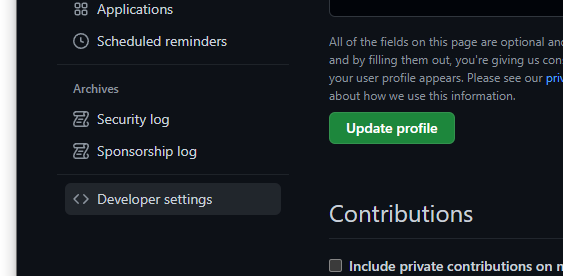
Developer settings로 넘어간다.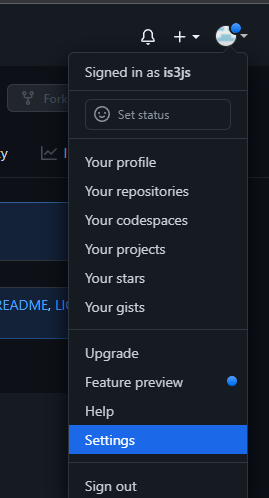
-
Personal aceess tokens로 넘어와 >
Generate new token을 만든다.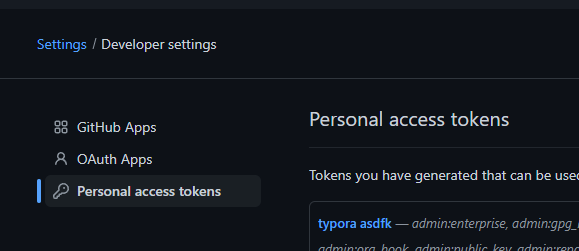

-
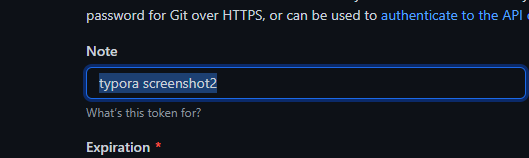
각종 필요한 설정을 해준다.
-
Note: 아무거나
-
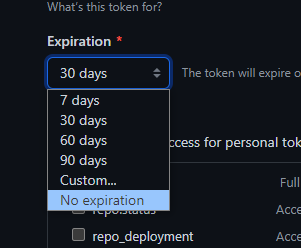
Expiration: 무기한으로
-
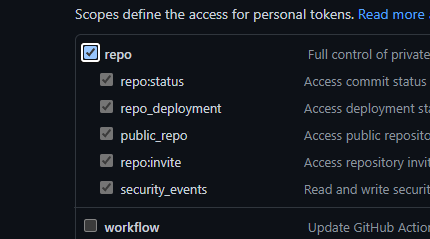
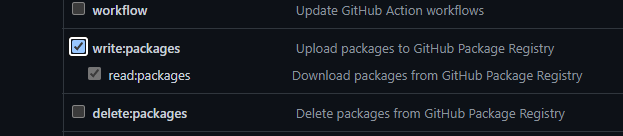
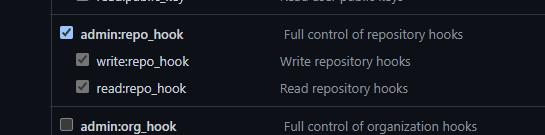
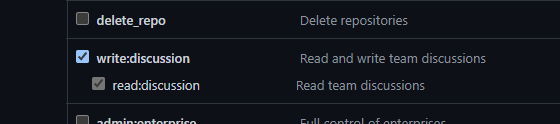
scopes
-
repo 전체 체크
-
write: packages 체크
-
admin:repo_hook 체크
-
write: discussion 체크
-
-
토큰을 챙겨놓는다.
-
-
TYPORA에 적용
-
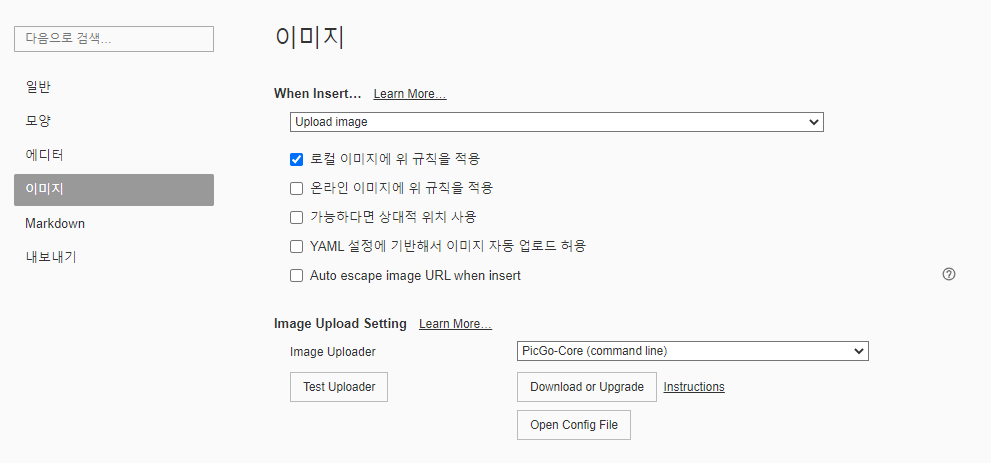
서식 > 이미지 >
전역 이미지 설정-
when Insert :
upload image로 선택 -
[x]
로컬 이미지에 위 규칙을 적용체크 -
image Uploader:
PicGo-Core(command line)선택 -
Open Config File클릭후 아래 템플릿대로 작성- 예시
 {
     "picBed": {
         "current": "github",
         "github": {
             "repo": "is2js/screenshots", //변경
             "token": "ghp_8nmOf//ymaH8bBHqXNsLRtoTHUEN8j1B6vh/", //변경
             "path": "",
             "customUrl": "https://raw.githubusercontent.com/is2js/screenshots/main", //변경
             "branch": "main"
         }
     },
     "settings": {
         "showUpdateTip": true,
         "autoStart": true,
         "uploadNotification": true,
         "miniWindowOntop": true
     },
     "needReload": false,
     "picgoPlugins": {}
 }
-
사용 중 레포지토리만 교체
-
typora > 서식 > 이미지 > 전역이미지 설정 >
Open config file>-
"repo"와"customUrl"에서 폴더명만 바꿔주면 된다. -
토큰은 계속 유지중이니.. 레포만 바꿔주면 끝.

-